For assessment 1 I arranged for the band ‘Ventures’ (www.soundcloud.com/ventures) to come in to the studio to record one of their songs, hoping to achieve the space, depth and ambience of my reference tracks, as I felt they were a good match. The organisation of the band was a big challenge in itself, but multiple difficulties were overcome. Sadly my phone ran out of batteries early on in the day and I was unable to take photos for the purpose of this blog post.
For the drums I initially tried the Glynn Johns technique, but despite moving the mics many times found difficulties with phase with the drummers many cymbals. I eventually settled on using two spaced cardioid microphones (Neumann TLM’s) above the kit, (A/B technique) along with dynamic mics (Sennheiser) on the Toms, an SM57 on the snare top and an AKG 414 (in cardioid) on the side of the snare to capture the body. Finally, a large diaphragm AGK dynamic mic was used on the bass drum. The sound was more present than I wanted it to be in terms of my reference material, something I later addressed in the mix.
The guitarist used two amplifiers with different tones, so I miced each using the 3 – 1 rule in order to later be able to blend the signals across the stereo field to create a large ambience. The guitarist arrived with many delay and reverb effects and a quite compressed tone to begin with, meaning I wouldn’t be likely to apply much processing afterwards making the mic placement imperative.
I wanted the acoustic guitar to feature strongly at the front of the mix, and to have an exciting stereo sound, so I used the MS technique using the two Royer ribbon mics. We made some overdubs to add ‘decoration’ to the quiet parts.
The bass players amp was rather noisy, and we spent quite some time trying to even out the frequency response before recording. The DI was unusable due to excessive noise, so I used two different mics on different speakers at exatly the same distance in order to be able to choose between tones, or blend the signals. Bass is largely omnidirectional, and in the mix I plan to send it centrally, so I decided not to use a streo recording technique.
With the vocalist we took multiple takes to choose the strongest performances from. In terms of my reference material, I wanted a clean and present sound for the vocals, so we used a Neumann TLM in the cardioid pattern
The short piano part was intended to be used during a short, spacy break in the song, so I used two omnidirectional (DPA) microphones in an AB (spaced pair) configuration, one near the higher pitched strings, one nearer the lower pitched strings to be able to push the piano really wide. The room with the acoustic piano is very ambient, which was ideal for its intended use.
During the recording we ‘dropped in’ the drums and guitar twice to get better takes – this was made easier by the use of a click track. Sadly the click is audible through the acoustic guitar headphones and I was unable to separate the sound from the acoustic guitar track. Done again I use more isolated headphones and / or turn down the monitor feed to the musician. I set the converter to record at 24bit 192k to capture as much dynamic range with as low noise as possible, but I didn’t notice much difference in sound, and it made it rather difficult to work with the large filesizes – I wouldn’t do the same again.
Mix
All tracks are ‘topped and tailed’ for a clean start , each with fade in/out; 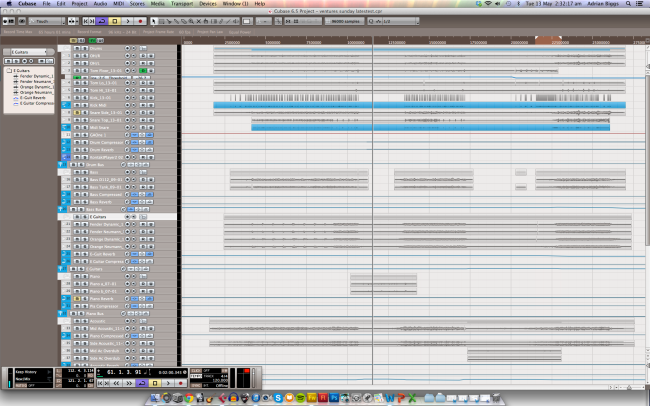
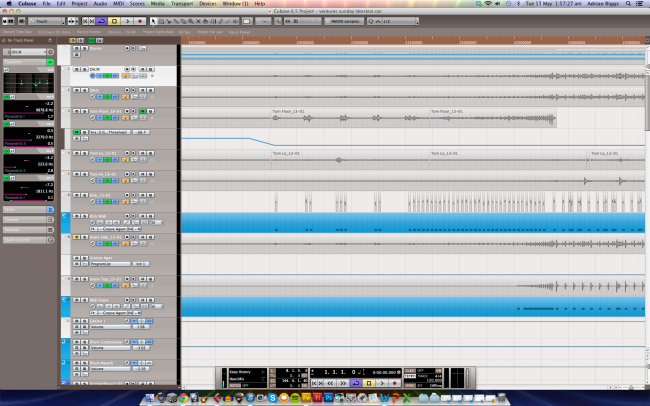
Drums; First I used a sample delay plugin to move the transients of the close-mic’d drums to match the overheads. Each Drum was EQ’d Then I summed the drum tracks to a stereo bus, which sent signal to a parrallel compressor and reverb to create the ambience I wanted – where the drums were quite distant. I panned each individual drum to its relative position in the stereo field (not too wide) and eq’d the overheads to surpress the snare a little, and to take off a bit of the presence from the close micing. The toms were gated, and the snare top and bass drum had great isolation, so I used strip silence to clean up the drum sound. I didn’t use the snare side mic in the mix, as it picked up a lot of cymbals and didn’t blend well.
As well as the above, I converted the audio tracks for the snare top and bass drum to midi, in order to blend in some frequencies I was unable to bring out with eq, and was sure they were subtly used. The midi data was velocity sensitive and triggered a drum sample, which was itself eq’d appropriately and sent to the drum reverb channel. I used automation to change the threshold of the floor tom, as it was used for a slow build up which didn’t quite trigger the gate for the first few hits. I also gave the drums a tiny boost in the final section for a ‘big finish’, like my reference material.
For the guitar I spread the guitar intelliigibly across the stereo field, alternating the close and distant mics, in a way which emphasised the contrasting tones of the two amplifiers. I wanted the guitar tone to be full, but not in the front of the mix. I summed all of the guitar tracks to one bus, and used a little reverb to create a little more space. The guitar was eq’d to try and remove some of the harsh resonances from the recording, and only a touch of parrallel compression was used. I automated the volume for the quieter sections to bring out some of the suble harmonics the guitarist was playing.
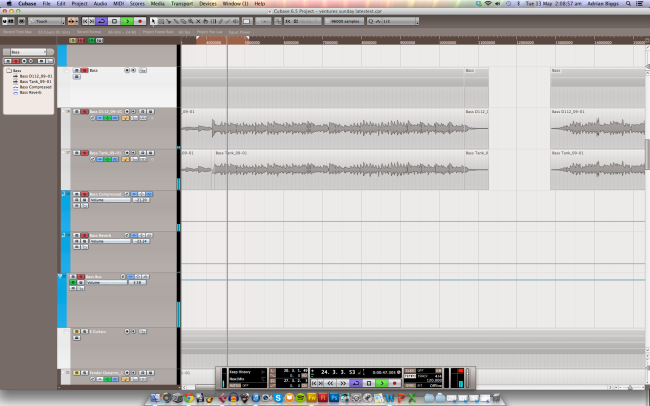
The bass was a real challenge, but thankfully my reference material called for it to sit at the back of the mix, largely in the sub frequency range. I was able to eq out a lot of the noise, and use parrallel compression and reverb to give the ambience of a large room.
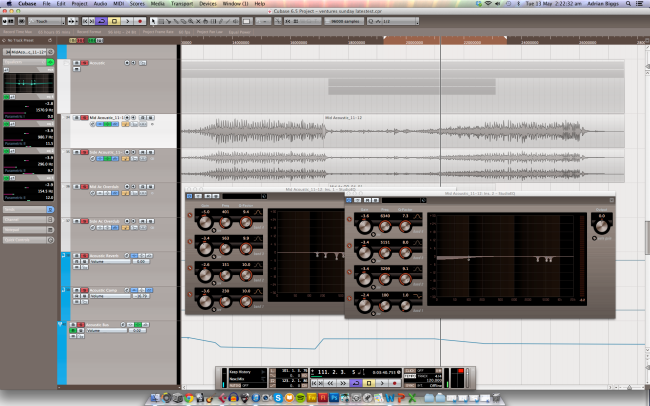
For the acoustic guitar, I eq’d the mid and side channels separately to remove harsh resonant frequencies, and make sure it was present in a mono playback, but still be spread accross the stereo field. I wanted to give the impression of the singer standing at the front of the room with his acoustic guitar, so tried very hard to match their position using eq and compression. Clipping was avoided throughout, and all compression used was very subtle, to try and keep the dynamic range of the instruments. I automated the volume during the quieter sections to really bring out the subtle things the guitarist was playing.
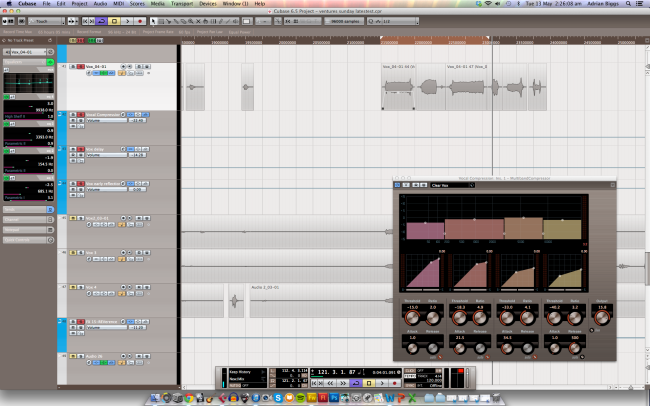
For the vocals, I used eq and compression to retain a natural sound, but for it to be full and present at the front of the mix, like my reference material. I tried to level the volume as much as possible without by cutting the vocal into phrases and normalising, making minor changes to each by ear.
For the piano, I applied a large amount of parallel compression to match the way it is used in my first reference track – I think it worked really well in making the sound warm, but ambient.
I bounced the multi-track project down to a stereo track before mastering, where I eq’d to first remove harsh / ringing resonances, then gave a more general boost to the high end and as closely match the sound of the professional reference tracks. I don’t feel I did well in this. Parallel compression was used subtly to give a fuller sound, before finally dithering to 16 bit/44.1k .
